What gets surfaced
If you use Salesforce Security Center to monitor your organization’s security signals, you can now integrate data from Cloud Protection for Salesforce directly into your dashboard. By registering file scan results, URL scanning activity, isolation actions, and identity breach alerts as Custom Metrics within Security Center, you can view threat activity detected by Cloud Protection for Salesforce side-by-side with your other security data.
You can register Custom Metrics for the following data types:
- Alerts: Configuration changes, detections, job statuses, exceptions, and grouped breach events.
- File Scan Logs: Individual file scan results and verdicts.
- URL Scan Logs: Individual URL scan results and verdicts.
- Breach Logs: Individual user identity breach records.
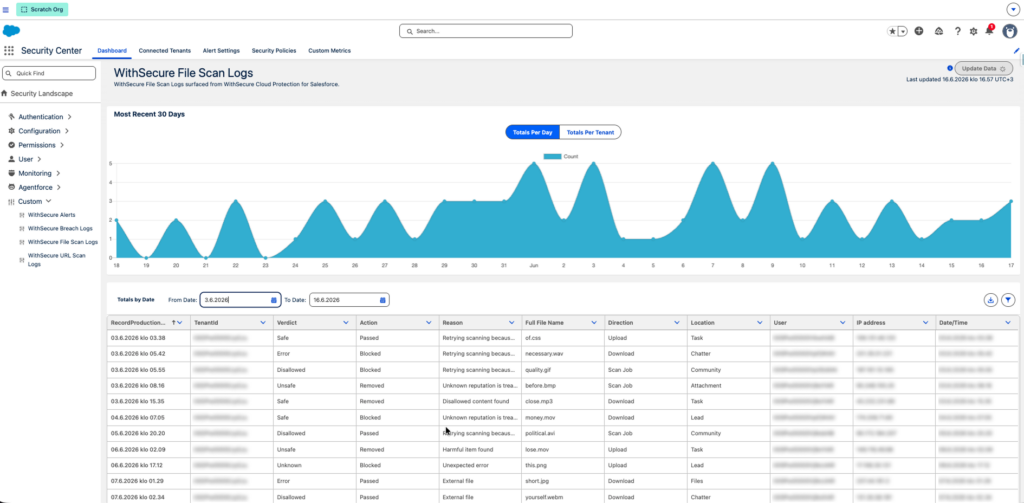
Once registered, each metric will appear on your Security Center dashboard, enabling historical trend analysis over time.
Setup Instructions
Assign Security Center Permissions
In Salesforce Setup, create a new Permission Set with the Manage Security Center system permission enabled.Assign this Permission Set to the appropriate administrator users.Open Security Center from the App Launcher.
Register Custom Metrics
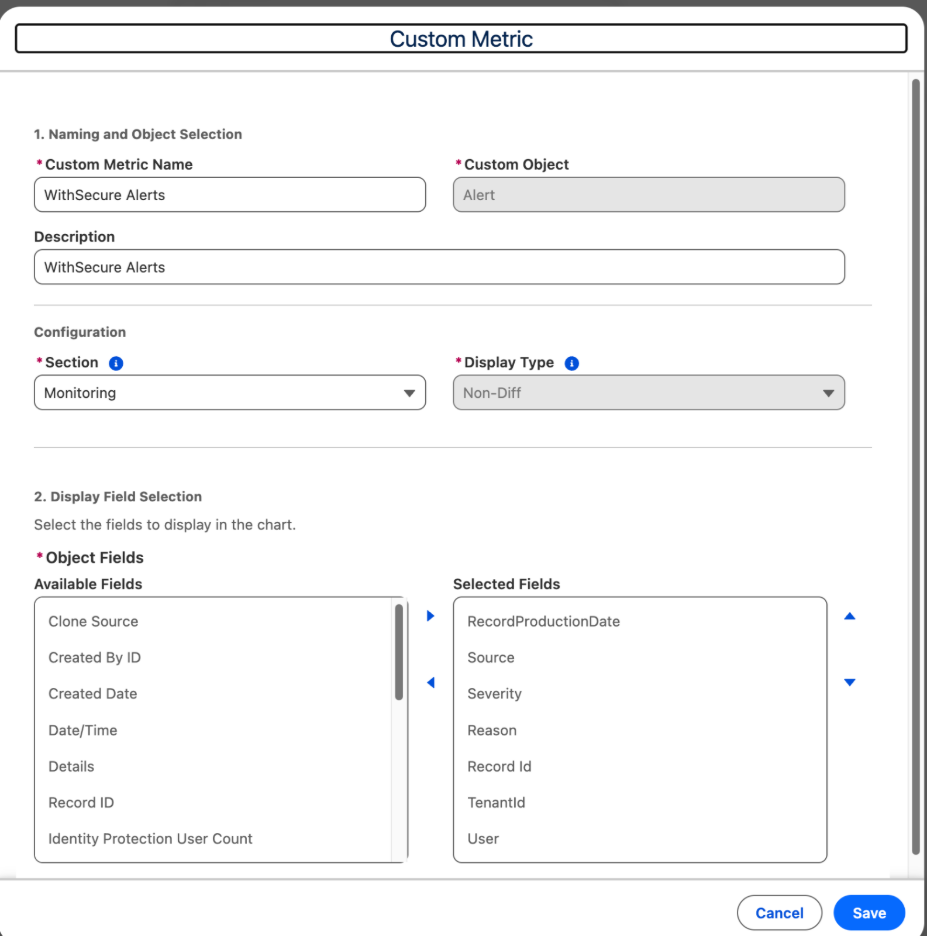
Navigate to Setup > Security Center > Configuration > Custom Metrics > New Custom Metric, and create one metric for each data type. Configure the following fields for each metric:
- Salesforce object to retrieve data from: Select Cloud Protection for Salesforce File scan logs, URL scan logs, Breaches, or Alerts.
- Fields to display: Choose the relevant fields (refer to the recommended field mapping below for details).
- Tenant ID & Record Production Date fields: (Used for organization identification and generating historical trends).
After configuring each metric, save and activate it.
Recommended Display Fields per Metric
Alerts — AFSC__FS_Alert__c (5 fields)
| Label | API name | Notes |
|---|---|---|
| RecordProductionDate | AFSC__RecordProductionDate = CreatedDate | The RecordProductionDate will be auto filled with the created date. |
| Severity | AFSC__Severity__c | Information / Important / Critical |
| Reason | AFSC__Reason__c | Free-text alert description |
| Source | AFSC__Source__c | Scanner that generated the alert |
| User | AFSC__User__c | Linked user or “N users affected” |
| TenantId | AFSC__TenantId__c | 15 digit Org Id |
File Scan Logs — AFSC__FSFileScanLog__c (9 fields)
| Label | API name | Notes |
|---|---|---|
| Date/Time | AFSC__RecordProductionDate AFSC__Date_Time_Scanned__c | Scan timestamp; default sort |
| Verdict | AFSC__Verdict__c | Safe / Unsafe / Disallowed / Unknown / Error |
| Action | AFSC__Action__c | Blocked / Removed / Passed / Notified |
| Reason | AFSC__Reason__c | Free-text description |
| Full File Name | AFSC__Full_File_Name__c | Links to content document or record |
| Direction | AFSC__Direction__c | Upload / Download / Scan Job |
| Location | AFSC__Source__c | Files / Attachments / Notes / etc. |
| User | AFSC__User__c | Linked user |
| IP Address | AFSC__Ip_address__c | Captured at scan time |
| TenantId | AFSC__TenantId__c | 15 digit Org Id |
| RecordProductionDate | AFSC__RecordProductionDate = CreatedDate | The RecordProductionDate will be auto filled with the created date and could be different than the scan date time. |
URL Scan Logs — AFSC__FS_URL_Scan_Log__c (9 fields)
| Label | API name | Notes |
|---|---|---|
| Date/Time | AFSC__Date_Time_Scanned__c | Scan timestamp |
| Verdict | AFSC__Verdict__c | Safe / Unsafe / Disallowed / Unknown |
| Action | AFSC__Action__c | Blocked / Removed / Passed / Notified |
| Reason | AFSC__Reason__c | Free-text description |
| URL | AFSC__URL__c | The scanned URL |
| Direction | AFSC__Direction__c | Open / Post / Internal or External Conversation |
| Location | AFSC__Location__c | Cases / Chatter / Email / Lead / Task / Field Value |
| User | AFSC__User__c | Linked user |
| IP Address | AFSC__IP_Address__c | Captured at scan time |
| TenantId | AFSC__TenantId__c | 15 digit Org Id |
| RecordProductionDate | AFSC__RecordProductionDate = CreatedDate | The RecordProductionDate will be auto filled with the created date and could be different than the scan date time. |
Breach Logs — AFSC__FS_Breach__c (14 fields)
| Label | API name | Type | Notes |
|---|---|---|---|
| RecordProductionDate | AFSC__RecordProductionDate = CreatedDate | DateTime | The RecordProductionDate will be auto filled with the created date. |
| Publish Date | AFSC__PublishDate__c | DateTime | When the breach was originally published by the breach source. |
| Risk | AFSC__Risk__c | Picklist | Low / Medium / High / Critical |
| Severity | AFSC__Severity__c | Number | Numeric severity score for the breach. |
| Reason | AFSC__Reason__c | Picklist | Breached information / Breached plaintext password. |
| Plaintext Password | AFSC__IsPlainTextPassword__c | Picklist (Yes / No) | Whether the leaked password was exposed in plaintext. |
| Password Type | AFSC__PasswordType__c | Text (255) | Type/format of the leaked password (e.g. hashed, plaintext). |
| AFSC__Email__c | Text (255) | Email address tied to the breached account. | |
| Username | AFSC__UserName__c | Text (255) | Username associated with the breached credentials. |
| Profile | AFSC__UserProfile__c | Text (255) | Salesforce profile of the breached user. |
| Role | AFSC__UserRole__c | Text (255) | Salesforce role of the breached user. |
| User | AFSC__User__c | Lookup (User) | Linked Salesforce user record for the breached account. |
| Target URL | AFSC__TargetUrl__c | Text (255) | Source site/service where the breached data was found. |
| TenantId | AFSC__TenantId__c | Text (15) | 15 digit Org Id |
Register from Cloud Protection for Salesforce (release Autumn 3.4 and later)
If you are using release Autumn 3.4 or later, you can register the metrics directly from the Cloud Protection App. In the Cloud Protection App, go to Administration → Tools and find the Connections section. Click Start to register the following custom objects as metrics with Salesforce Security Center:
- Alerts
- File Scan Logs
- URL Scan Logs
- Identity Breaches
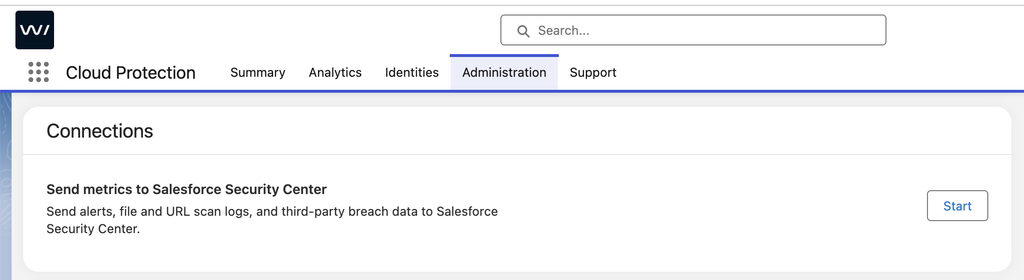
The Start button is only visible to users who have access to Salesforce Security Center, so complete the permission step above first. Running it more than once is safe, as any metric that is already registered is skipped.
Once registration finishes, continue to Verifying the Dashboard below.
Verifying the Dashboard
Once setup is complete, open your Security Center dashboard to verify that each metric is displayed and data is updating properly.
Note: If a metric appears empty, click Update Data. Please keep in mind that Security Center operates on its own refresh cycle, so the initial data load may take a few minutes.
Backfilling Historical Data
By default, required fields in Security Center apply only to records created after the upgrade. If you want to view historical records in your trend charts, you can backfill up to six months of data using Salesforce Data Loader. This step is optional — if you only require future data, you can safely skip it.
You can also read more details on the setup from this blog.
Before setting up the Security Centre, do I need to configure anything in Cloud Protection for Salesforce?
No additional configuration is required in Cloud Protection for Salesforce. The fields required by Security Center have been automatically included since Release 3.3. You simply need to complete the configuration steps in your Salesforce settings.
Can I choose the type of data displayed in the Security Centre?
Yes. As each data type is registered as a separate custom metric, you have complete control over which metrics are displayed on the Security Centre dashboard.
Will the scan data and alert data I currently have on file be displayed automatically in the Security Center?
By default, only records created after the upgrade to Release 3.3 are displayed in the Security Centre. If you wish to display historical data on trend charts, you can use Salesforce Data Loader to import records dating back up to six months.